Monday, July 30, 2018

Dehydrating Home grown Spices

It’s time to start dehydrating some of my herbs I have been growing in my garden this year. Today I will show you how I dehydrated my Basil and Parsley from my garden. My herbs are doing very well this year.

The first one I will show you is my Parsley.

1.       Wait till your Parsley is a good foot tall before cutting some down.


2.      

Cut off ends and anything that has any brown on. You want your Parsley to be a nice bright green color.

3.     
  Cut your Parsley into ¼ to ½ inch long little pieces.

4.     

  Place into a colander and rinse several times to get off any excess dirt of bugs.

5.      
Take your dehydrating tray and place the fruit roll-up tray on top. This will keep your small pieces of Parsley from falling through.

6.     
  Place another empty tray on top so the heat source does not touch your Parsley.

7.     
  Set your dehydrator temperature for herbs and spices. This is usually the lowest temperature setting.
This will take most of a day to dry properly. You want the Parsley to be crumbly and very dry.

8.      
When dry place in a zip lock bag or a sealed container.


The second Herb I will show you is my Basil.

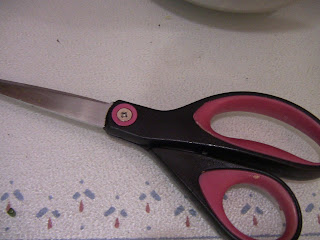
1.       Cut your Basil with scissors from your garden.

2.       Some people have tried using a slotted spoon to remove the leaves, but I find this not to work so well. I just start picking the leaves off by plucking them.

3.     
  Place the Basil in a colander and wash several times to remove any dirt and any bugs.

4.     
  Place the Basil on your dehydrating tray with a fruit roll-up tray on top so the Basil does not fall through as it is dehydrating. Place another tray on top to protect your basil from the heat source.

5.      
Set your dehydrator to the herb and spice setting. This is usually the lowest temperature setting. This will take about a whole day to dehydrate your Basil.

6.     
  When dry, leave whole or crunch up into little pieces. Place in a sealed zip lock bag or a sealed container.

These spices will keep for several months as long as they are kept in a cool dry place.
I love having fresh herbs and spices from my garden. Herbs and spices from the store are very expensive. Try to grow your own herb garden soon and enjoy fresh spices instead of store bought. You can grow herbs and spices all year round if you have a nice warm and lighted area to grow them in some pots. Enjoy fresh herbs year-round from Suzie Homemaker.

Monday, July 16, 2018

Duct Tape the Other Cleaning Tool

How many of my readers have pets? We have a cat and she sheds all the time. Even dogs can shed a lot. Today, I want to show you how I remove cat hair from curtains and furniture easily. I try to do this once a week to keep up with all her shedding she does. Besides regular baths and combing her she still sheds a lot. As you can see my curtains are really bad because she loves to lay in my front window and watch the world go by. I will show you how I cleaned my curtain in under 20 minutes with great results.
I have tried using a vacuum cleaner and this does only so good. I tried a damp cloth and it still did not clean very well.

Duct tape the other cleaning tool

1.     
  Cut a long piece of duct tape and make a circle and stick it together.

2.      


Place the duct tape ever your hand

3.      
Rub the duct tape up and down over your curtains.

4.   
    For furniture do the same thing or just take a long piece of tape and stick to the furniture to pick up the cat hair.

5.       The tape will bunch up but can still be used until there is no more sticky places are left.

6.     
  Repeat the whole process over and over again until all your curtains and furniture is clean.

I was amazed at how well this worked and how it took off the cat hair with ease. I was stunned at how easy this was and that duct tape can be used for so many different things besides holding things together.


Next time you need to get rid of cat or dog hair, try this easy duct tape trick from Suzie Homemaker.

Monday, July 9, 2018

Mold-Be-Gone

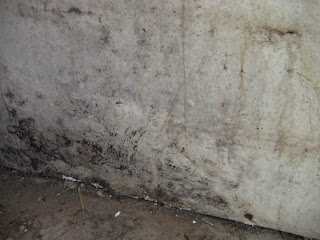
 I hope everybody had a nice Fourth of July! Today I want to talk about mold, yes I know not a fun topic but everybody has had trouble with this at some point in their lives.  With all the rain and heat this has become a problem I found out in my garage. So I did some research and found something that really works to get rid of mold. Like I said in previous posts I like to test these products to make sure they work before giving them to my readers. Since I have the problem starting in my garage, I thought I would share with you what I found that worked very well at getting rid of the mold I found.

2 Simple Ingredients

2 Cups Water                                                   2 Teaspoons Tea Tree Oil

1.       Take a spray bottle and put your 2 cups of water in it.
2.       Next, put 2 teaspoons of Tea Tree Oil in your water. Shake well.
3.       Spray the mixture on the mold and watch it melt away.
4.       If you have a tough mold stain spray extra on and use a little brush and scrub the affected area s of mold and then let dry.

I was amazed at how well this really worked. A bottle of Tea Tree oil cost under $5.00 dollars. I like to share ideas with my readers and this one really works and is very cheap to make a bottle of this solution.

Here are some before and after pictures of the mold I found on my garage floor and walls.


 Why go out there and spend a fortune on mold removers when you can make this very cheap solution right at home. So if you have a mold problem I hope this Tea Tree Oil solution helps with your mold problems from Suzie Homemaker.

Monday, July 2, 2018

Home Grown Rhubarb Tort

Happy Fourth of July to all my kind readers! Today I want to give you my mother’s Rhubarb Torte recipe for you to make for the Fourth of July. This is the time of year when rhubarb is ready for the picking and eating. My kids love to eat rhubarb straight from the garden by dunking it into sugar for a sweet-tart treat. This recipe takes about an hour to make because you have to cut up and skin the rhubarb.


Rhubarb Torte

Crust

1 Cup all-purpose flour                                                5 Tablespoons sugar
½ cup butter

Filling

2 eggs beaten                                                                1 ½ cups sugar
½ cup flour                                                                     ¾ teaspoon baking powder
½ teaspoon salt                                                             2 cups chopped and skinned rhubarb

1.       First, you need to chop and skin your rhubarb. Chop up into bite-size pieces.

2.    
   Now you need to make the crust. Melt your butter in the microwave and add your flour and sugar. Mix together with a spoon. Spray your pan with nonstick spray.

3.      

Flatten out your dough into a greased cake tin with your hands or a spatula.

4.      
Bake your crust at 350 degrees for 15 minutes. The crust should be a golden brown.

5.      
While your crust is baking mix together you filling mix.

6.       Beat your eggs with the sugar, then add your flour, baking soda, and salt and mix well.

7.       Lastly, add your chopped and skinned rhubarb to the mixture, mix well.

8.      
Pour over your baked crust and spread evenly.

9.     
  Bake 350 degrees for another 30 minutes.

10.   Enjoy with a topping of cool whip, ice cream or just by itself

I hope you all have a Happy Fourth of July, and I hope you like my nice sweet and tart dessert to go with your fry out. I hope you find a nice patch of rhubarb to pick, from Suzie Homemaker.