Monday, June 26, 2017

Fun Outside Games

                Today I decided to give you some more outside games to make out of things you probably have right at home. Your children and grandchildren need to be outside enjoying the weather anyway, so let’s give them some fun things to do. These games are meant to be played outside. Kids get bored easy so these games will keep them busy for hours.

1.       The first game I would like to show you is a balancing beam. Take an old two by four and put it on the ground and let them walk across it. If they are a little braver put some bricks underneath them and raise it up to give them a little challenge to see if they can still balance. They can start out slow then gradually speed it up to see how many times they can make it across without falling off. As you can see we have a mama kitty who wants to practice balancing too.

2.       The second game is bowling. Take two, two by fours and place them about 3 feet apart on the ground. Place some old soup cans at the end and use a plastic ball as your bowling ball and start knocking down your cans. Any kind of ball will work like a basketball or soccer ball.

3.       The third game is using old logs. If you have someone with a fireplace ask if you could have a few logs that are level. Place these logs in a line or circle and start walking on them to practice your balancing act. Another fun thing is to just sit on them in a circle and just talk.


4.       The fourth game is rope or yarn jumping. Take some rope or yarn and tie them to a tree, chairs or even your logs. Have the children crawl under them or jump over them. Place them at different heights and lengths to challenge them. Make limbo line for them to duck under.


5.       The fifth game is using old cookie sheets, plates or pans. Place these pans out in a row or a circle and have your children weave in between them. See how fast they can go weave in between them without stepping on them.

6.       Old tires are great for running in between them. Or for just sitting on and enjoying the day outside.

7.       Now that you have these games to make and play outside why not make an opstical course out of some or all of these games. Mix and match to make many different kinds of games to play outside.


The objective is to get your children and grandchildren outside having fun. Most of these things you probably have at home or could borrow from a friend or neighbor. Having fun does not have to cost a lot of money if you just look in your garage or basement. Making these games take very little time but can give the children hours of fun. I hope you enjoy some of the games I played when I was growing up from Suzie Homemaker.

Monday, June 19, 2017

Eatable Art Projects

                Here are fun projects children from ages 5 to 10 will enjoy. When I was little my mother would have us make these fun necklaces and bracelets. They use to sell these in the stores when I was little. I learned a lot from my mother on how to save money and make fun projects myself, instead of buying them. I used to make these with the children I  babysat for. Most of the things you will need you will probably have at home already. If not, go to a dollar store and pick these things up a lot cheaper than from a grocery store or even Walmart.

Art Supplies Needed

                Yarn any color                                         Scissors
                Froot Loops Cereal                                    Cheerios
                Life Savers Candy Mint or Flavored in Multiple Colors

1.       First, cut your yarn to the size of a necklace or a bracelet.

2.       Second start stringing on your Life Savers candy. Use all one color or use the multi-colored Life Savers Candy.


3.       If you want to have your candy stay in place, loop them at multiple places to make a nice designed necklace or bracelet.

4.       For the younger children use Cheerios cereal for less sugar to make a necklace of the bracelet.


5.       I like using the multi-colored Froot Loops cereal. Again if you want to make a design, loop your cereal to create a cute bracelet or necklace.

6.       When done, wear for a while then if you get hungry just start eating your candy or cereal off your necklace or bracelet.

7.       Repeat the whole process all over again to make a new design.

When I was little they use to sell these at Kmart. But they were a little expensive to buy very often. Why not make these necklaces and bracelets yourself and save some money. You can make these for pennies yourself and have a lot of fun in the process. Let your children or grandchildren experiment with the different candies and cereals to mix and match them. I hope you have fun making and eating these necklaces and bracelets from Suzie Homemaker.


Monday, June 12, 2017

Kids Noodle Art

Noodle Art Projects
                On hot and rainy days what can I do with the children or with my grandchildren? When my children were younger I would do a fun project inside on rainy days. Kids get bored quickly and they want something fun to do. This project I am about to show you I also used on the children I used to babysit and they loved it. Everything you need you should have right at home.

Art Supplies List

1.       Any type of noodles. ( I used angel hair noodles)
2.       Pan to boil them in.
    Use a strainer to strain them.
4.       Food coloring.
5.       Water for several bowls. (as many bowls you need for different colors)
6.       Vinegar for food coloring
7.       Paper toweling to put on a plate to dry the colored noodles.
8.       Cardboard or colored construction paper.
9.       Glue to glue on the noodles.

How to Make Colored Noodles
,
1.       First, boil as many noodles you think you will need.
2.       In several different bowls start making your colors you will want. Check the back of your box or food coloring to see how to make the colors. ( Here is the basic recipe that I used.) ½ cup of water, 1 teaspoon vinegar, and ¼ teaspoon of food coloring.
3.       Place your noodles in each bowl or coloring and let stand for 5 to 10 minutes depending on how dark you want your noodles to be.
4.       When dark enough place them on a plate with paper toweling to let dry. Let dry for about 20 minutes.
5.       Take a piece of construction paper or a piece of cardboard for your background. I used the back of a cracker box or cereal box for my background. This is much sturdier than a piece of paper.
6.       With a glue bottle, start gluing your noodles onto the background. You can make a picture or any design you like with these noodles.

Your children or grandchildren can help make these noodles from start to finish. This will keep them busy on a hot or rainy day. Just think of all the fun they will have helping make these noodles and how much fun they will have making their own pictures out of these colored noodles. This whole project will cost you pennies to make and think of all the fun you and the children can have in the process. Having quick and easy projects to do with your children and grandchildren is a must on hot and rainy days. I hope you enjoy my colored noodle project from Suzie Homemaker.


Monday, June 5, 2017

Homemade Forts

                Summer time is here, time for some fun things to do with the children and grandchildren. How many times have you heard the children say, I’m bored what can I do? When I was little my two sisters and brother would ask my mother for some clothes pins and some old blankets and sheets. When it would rain we would make this inside and when it was nice we would make this out- side. I am talking about making forts. We always had so much fun making different rooms in our forts. Everybody has old sheets, blanket and clothes pins.If you need some clothes pins they're are cheap if you buy them at a dollar store. The children can have hours of fun with a fort. We would leave our forts up until my mother would need her clothes pins for the laundry. We made four different kinds of forts when I was growing up.

1.       The first kind of fort we made when we were really young. Take some kitchen or dining room chairs and throw some sheets or blankets over them. We would make tunnels or rooms with the chairs. This was fun to crawl through or just hide in. This is a great way to play hide and seek with the little ones.

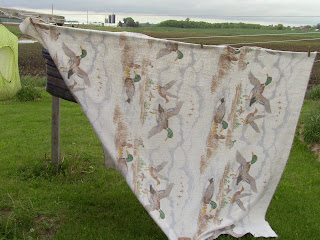
2.       Using your clothes lines outside hang your blankets or sheets over and around your lines. With the clothes lines, it is easier to make rooms or rows. Use bricks or rocks to hold down your fort. Now you can eat outside in your own little fort. You can leave the top open to let in the sun or cover it up like a roof. This fort is so much fun to have outside and enjoy the weather.

3.       If you do not have clothes lines outside just hang some rope between some trees. Then take your sheets and blankets and clothes pin them together to make your fort. You can make this fort any size you like and make several rooms inside. Again leaving the top open lets in the sun, but the choice is yours if you want a roof on top. Put a few lawn chairs inside and use a fold up table and you have a little house to play in.

4.       If the weather is bad outside make this fort inside in your basement. Tie up some rope around the rafters and start hanging your blankets and sheets. This was a fun fort we made year round not just in the summer. But when it got really hot and humid outside this was a fun fort to sleep in overnight. We would roll out the sleeping bags and have a sleep out in the basement in our fort. We would make our own little individual rooms to sleep in.


This brings back so many good memories of when I was growing up. Having fun with your children and grandchildren does not have to cost a lot of money. Sometimes the simplest things can bring such big memories. Everybody has blankets and sheets, why not use them to have some fun from Suzie Homemaker.