Wednesday, April 13, 2016

Do-It-Yourselfers

This post is for all you Do-It-Yourselfers! This is another way to save money. If you are handy with a hammer, screw driver or paint brush, why not do it yourself. Today I will show you a few things that I do myself or with a little help from my husband and children. Knowing you can do the project yourself and save the cost of a professional coming out to do the job, gives you a sense of accomplishment. Here are a few things we as a family do, as a Do-It-Yourself project.

Oil changes for your car can be expensive if you take them into a shop to be done. Here is where my husband and including my daughters have changed the oil in the car. Yes I have changed oil in our cars too. Just go to the store and buy your own oil and filter. My husband has car ramps, he just drives the car up on the ramps and puts a pan underneath to drain the oil. I wasn’t  kidding when I said my daughter can change oil, the school she goes to has a mandatory shop class. I think this is a great idea because they are taught minor maintenance of a car including changing a tire. Besides when you go to a shop they always try to tell you need more done, like your air filter is bad. Buy this in the store and replace it yourself for less than half the cost that they will charge you. If you feel you can’t change your oil yourself, try finding a neighbor or home mechanic.  Try going to a local school that has a shop class. My daughter’s school is always looking for cars to do minor repairs and oil changes on, for free. All you have to do is buy the oil and filter. With the teacher watching, the students learned how to do minor repairs on cars as part of their homework assignment.

                Repairs inside the house can be costly if you have to call a repairman. Most service calls start over $50.00 dollars. I recently had my control panel go out on my stove. I called a repair person to see how much it would cost and he told me over $300.00 dollars. Yikes! So I did a little research on the internet, found the part I needed and watched a how to fix and replace my control panel video. With the help of the internet , I was able to buy my part cheaper and also watch the video on how to replace the  part. This whole project took 3 days for the part to come in and 1 hour to replace the part. By ordring the part online  it only cost us $75.00 to repair my stove.  All the things that break in your house can easily be fixed by yourself at the fraction of the price.

                This one my daughters don’t like to well, but mom rules on this one. Doing dishes by hand or dish washer. Yes I have a dish washer but it does not get used. We have 4 sets of hands that can do the dishes. The dish washer cost money to run and uses to much water and takes too long to dry. As you can see I wash all my dishes by hand and air- dry them. This is another reason I don’t use my dish washer, my youngest daughter decided it was for hiding all her goodies.


                Don’t get me wrong, sometimes you have to call in a professional.Some projects you can’t do yourself.. We found this out this last summer when our septic system decided to collapse. We were going to try and do some of the digging with our tractor to save some money, but this was way too much work and time we did not have. So we did our research and found a company that did a great job at a reasonable cost. Doing the big projects are sometimes better left for professionals, but the other jobs can be done by D0-It-Yourselfers like you. Do your research and save money form Suzie Homemaker.


Wednesday, April 6, 2016

Craft Projects Made Easy

Today I have a fun craft project to do with your children or girl- scout troop. This project is very easy to make and very inexpensive. Most of the materials you will need you probably have around your house. With a little prep time, this project can be done in about an hour depending on the size you make.

Materials Needed

Crafting foam or cones                                                   scraps of material in different colors

Scissors                                                                           Ruler

Pinking shears (optional)                                                Pencil or Pen

Beads, buttons, colored tacks, or any other flowers or decorations


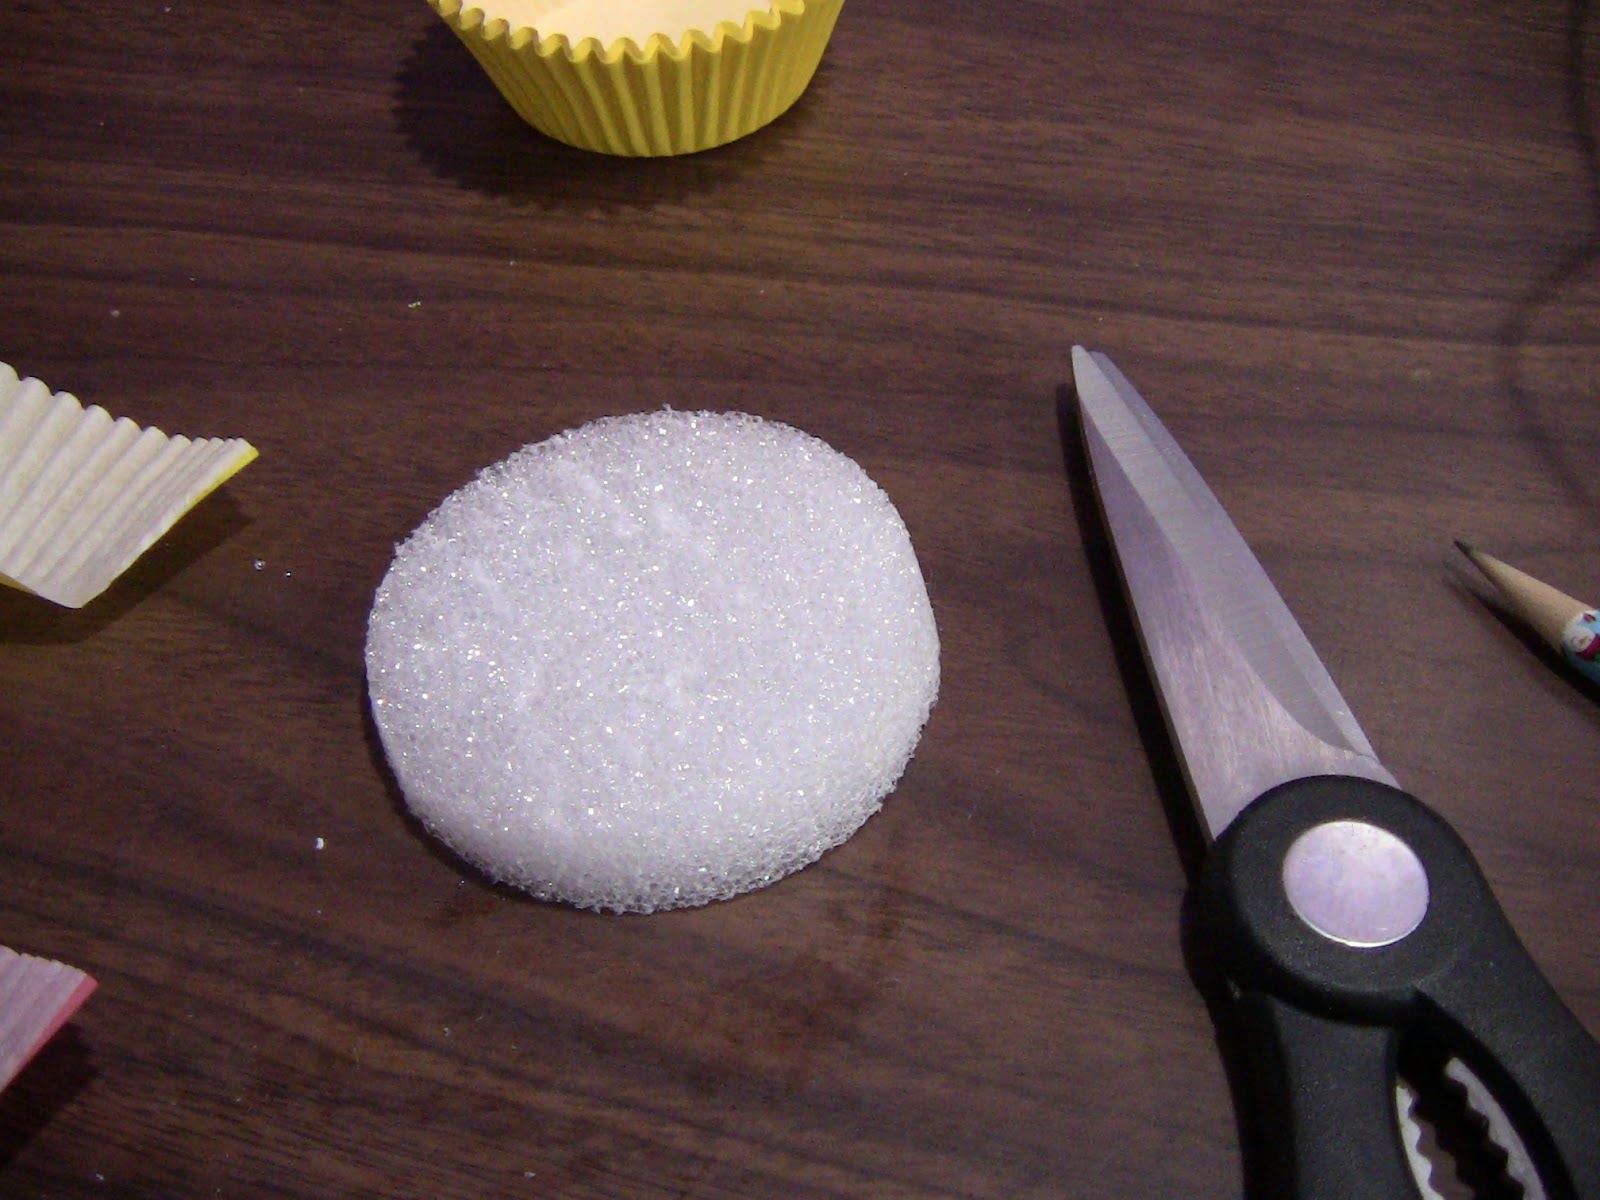
1.       First, cut your foam or cones into whatever shape you like and make it, at least, ½ inch thick. I did circles to make it easy. I have also done heart shapes.


2.       Cut your material into 1 ½ inch squares of different colors or all one color depending on what you like. Sometimes I even add lace to dress it up a little bit. If you want this project to last a little longer, use pinking shears to cut your material so it does not ravel.


3.       Take your pencil or pen and place it in the middle of your material and wrap the material around your pen or pencil.


4.       Next, push your wrapped pencil or pen and push it into the foam. By twisting the pen or pencil just a little bit this will make it look like a flower. Take your fingers and spread it out just a little.


5.       Start by doing the sides first all the way around. Gradually start doing the top. Leave open any areas you want to put any or your beads, flowers or any other decoration.


Materials Needed

Crafting foam or cones                                                     Cupcake holders in any colors

Scissors                                                                                Pencil or Pen

Beads, Buttons, or any other flowers or decorations

1.       First, cut your foam or cones into any shape you want and make it, at least, ½ inch thick.


2.       Take your cupcake holders and cut them into 4 pieces.


3.       Take your ¼ piece of your cupcake holder and wrap it around your pen or pencil.


4.       Push your wrapped pen or pencil into the foam twisting a little bit. Spread out the paper a little bit to make it look like a flower.

5.       Start by doing the sides and gradually work your way to the top. Leave room for your beads, flowers, and any other decorations you may like to add.


This is a fun and inexpensive project to do with almost any age child. I did this project with my daughters Girl Scout troop. We made hearts at this time, but you can make any shape or size your like. We also took round foam balls and made hanging decorations with the material and the cupcake holders. I hope you enjoy this project from Suzie Homemaker.


Tuesday, March 29, 2016

Spring Planting

Spring is finally here, and now it is time to start my plants in the house. I start my plants inside 6 to 8 weeks before I want to plant them in my gardens outside. Now that we have longer days with sunlight, it’s time to start those plants that need a little head start.

Here are some of the plants that I start early.  I plant peppers, chives, parsley, honey dew melon, musk melon, watermelon, and tomatoes. This is just a few of the plants that I start early.  Most of the seeds that I use are from the year before. I save my seeds from my plants each year and dry them out. Then I store my seeds in zip-lock bags and use them the following year to plant. Free seeds are always nice to have.


Now it’s time to plant those seeds. I reuse my pots from year to year, so I do not have to buy pots. If you run short on pots try using containers you have around your house. I use cottage cheese containers, glass jars, spice containers, or any other container you can find. Poke a hole in the bottom and use the covers for drainage. Always buy some good potting soil to plant your seeds in.


My daughter wanted to do something different this year so we also planted some flowers. So I took some of my odd sized containers and let her decorate them before she planted her seeds. She decorated one with tin foil and another one with wrapping paper. When her flowers come up she can give them away as gifts or keep them inside or outside during the summer. This is a nice little project for your children to do. They can watch their flowers they planted grow.


As my plants start growing, I will post some pictures to show you how they are coming along. Gardening is one of my favorite hobbies, and as the summer progresses I will show you more of what I plant and grow. I love having my own fresh fruits and vegetables that I have grown with my own hands. Spring and summer are a great time to be outside getting your hands dirty and playing in the dirt.Try planting your own seeds instead of buying them, this saves time and money, Happy planting from Suzie Homemaker.

Wednesday, March 23, 2016

Easter Egg Brunch

Happy Easter! Easter is a time for getting together with friends and family. This time of year the flowers start coming up and hopefully, winter is coming to an end. Every year at this time we have a special Easter breakfast that my family likes to make and eat. So today I will be giving you my families Easter Brunch recipe. I make this recipe many times a year, but Easter is a special time that we share this recipe with the whole family for Easter breakfast.

Easter Egg Brunch


                8 eggs                                         1 Quart of milk (skim, 2%, or whole milk)

                2 teaspoons mustard                    1 teaspoon salt

                1/2 # shredded cheese (any flavor you like) I use Cheddar Cheese

                ½# bacon or ham                           Bread any flavor about 12 pieces

1.       Take a 9 by 13-inch cake tin and spray it with non-stick spray.


2.       Take your bread and butter them. Place the buttered side of bread down inside of pan.


3.       Take your cooked bacon (or turkey bacon), or ham and sprinkle them over your first layer of bread.


4.       Sprinkle half your cheese on top of bacon or ham.


5.       Take a blender and mix together your eggs, milk, mustard, and salt
.
6.       Pour ½ of the mixture over your bread, bacon, and cheese.


7.       Repeat the same process with another layer of bread, bacon or ham, cheese and then pour the rest of the egg and milk mixture on top.

8.       Bake at 325 degrees for 50 to 60 minutes.


This Egg Brunch is delicious and very easy to make. The recipe I am showing you today is only a half recipe. You can make as much as you like. Have a Happy Easter from Suzie Homemaker.

Wednesday, March 16, 2016

Doing Surveys for Cash Rewards

Today, instead of savings tips I going to show your how to make a little extra cash each month. Everybody likes a little extra spending money once in a while, so I thought I would show you how I make $55.00 dollars a month by only spending 1 to 2 hours a day on my computer. I will give you the two web sites I use to make extra cash, plus and extra web site I just started for more cash. I am talking about doing surveys and watching videos and reading news articles. You can spend as much time as you like or have available to do these easy surveys. When you have enough points just turn them into cash or gift cards. These web sites have so many different rewards to pick from.


The first web site I use is www.swagbucks.com. This web site has many different ways to earn points. I do surveys, Daily polls, Daily offers, Videos and more. To the left of the page is all your opportunities for surveys and more. Under Discover, you can find printable coupons, which you can use and earn points for redeeming them in your local stores and printing them. In the upper right corner is where you can watch your points add up. Press on the little round picture to redeem your points. This web site is so much fun and has a lot of surveys to pick from like. Gold, Partner, and Peanuts surveys. This one I usually earn $50.00 dollars a month just for doing some surveys.

The second web site I use is www.bing.com.  This web site all you have to do is search news articles. In the upper right corner do extra searches for extra points. After 475 points, earn your reward. This web site I usually earn $5.00 a month because this is all they will allow. This takes me less than 5 minutes a day to do.

The third web site I just started using so I don’t know how this will go yet. But they pay cash and the surveys are similar to the swag bucks surveys. My daughter found this web site for me. The web site is www.ipoll.com.

Everybody likes a little spending cash once in a while, so why not try this out. Spending 1 to 2 hours a day really can pay off. With just the first two web sites I make $ 660.00 dollars a year. Adding the third web site just gives me more cash. Have fun doing surveys and giving your opinions, while earning cash from Suzie Homemaker.


Monday, March 7, 2016

Stain Remover for Stainless Steel Pans

How many times have you burnt on some food in your stainless steel pans? Well, my oldest daughter decided to make a batch of popcorn in one of my stainless steel pans and did not add enough oil and burnt my pan pretty good. I tried Soft scrub and then I tried an SOS pad and it would not take out the stain. I thought my pan was ruined. So I did some research and I found an easy recipe for cleaning my burnt stainless steel pan. So today I am going to show you my burnt stainless steel pan before and after I used this recipe.

Here is my stainless steel pan my daughter burnt popcorn in. As you can see there are a lot of little black dots from the popcorn. Like I said I scoured and scrubbed and still could not get this pan clean until I tried this easy recipe.


First take your pan and put 2 to 3 inches of water in the bottom. Next add ¼ cup of baking soda and ¼ cup vinegar. Stir the baking soda and vinegar together and boil for 15 to 20 minutes. Take off the burner and let cool for 30 minutes


.
After the liquid is cooled I just took a sponge and a little dish soap and washed the pan out. With very little effort the burnt on popcorn stains disappeared. If the stain still does not disappear repeat the process over again.


Instead of using all those harsh chemicals I used things I already have at home. This recipe is easy and very inexpensive to make and use. Hope this helps with some of your burnt on stains from Suzie Homemaker.

Wednesday, March 2, 2016

Easy Sock Pouches

What to do with old socks that are getting bad. Don’t throw them away yet. If you have socks with the heels getting thin or holes in them, I have an easy project that the children can help you with. So today I am going to show you what I do with old socks.

I cut off the heels and save the tops. Take the cut-off sock and inside it out and sew up the bottom. You can make these in different sizes and colors. I like to have different colors so I can color code them.  This is my way of knowing where all my remotes are.

I use these sock pouches for glasses, TV remotes, cell phones, soda cans and for my pens in my purse. These pouches are so easy to make and they keep everything clean and safe. With all the remotes you have in your living room I make an extra bag to hold all the sock pouches. Previously I showed you how to make a tie around waist clothes pin bag. I use the same pattern  but make the straps longer so I can tie them around the arm of my couch. This is where I keep all my remotes in the living room so I do not lose them.


Everybody has socks and the do get thin and old, so why not use them for an easy project that the children can help out with. Like I said before I do not like to waste things, so I find ways to reuse them. This is a quick and free way to use old socks. More saving ideas coming soon from Suzie Homemaker.