Showing posts with label Tomatoes. Show all posts

Monday, August 13, 2018

How To Can Tomatoes Crushed

Well, it’s time for canning season to begin, and today I want to talk about tomatoes. My daughter decided I needed tomatoes so I have a bunch to can this year, I will be canning juice and chunks of tomatoes for a while here. But today I want to try and can crushed tomatoes.

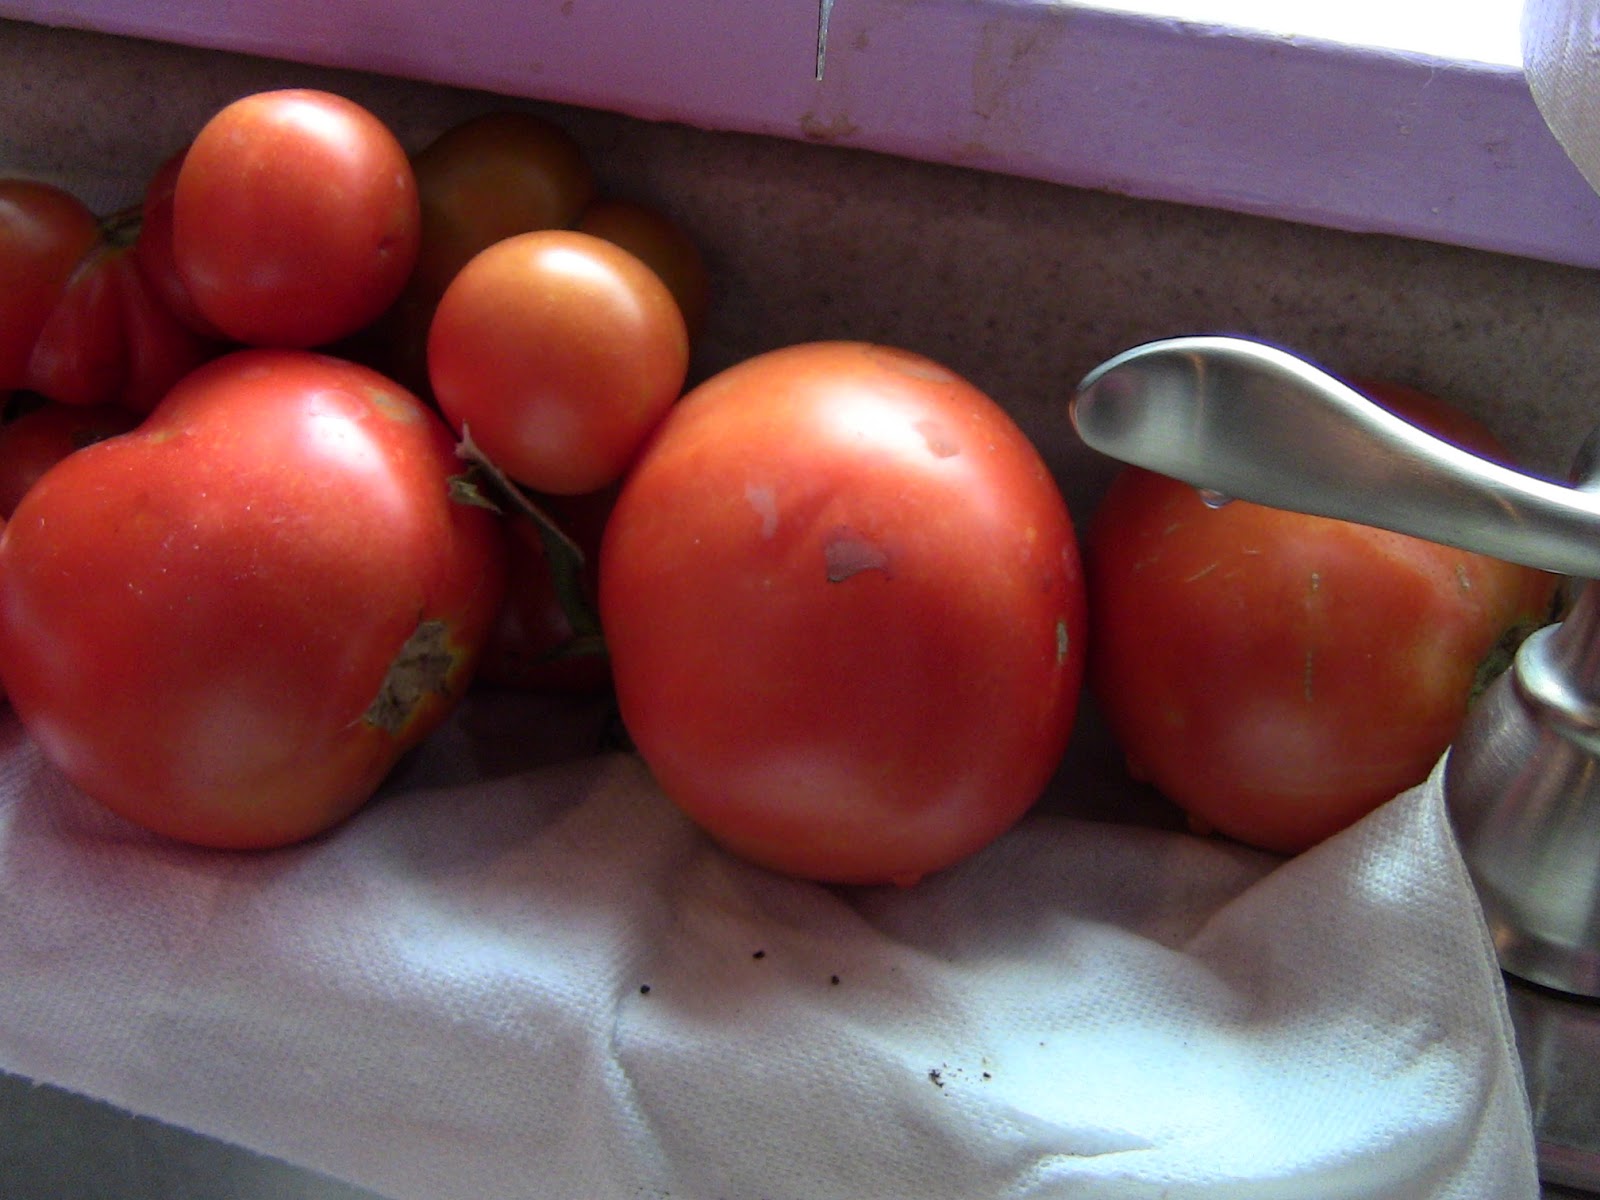
1.       First, you need a good amount of ripe red tomatoes.

2.       Wash your tomatoes very well before cutting up. Cut out any bad spots and all stems.

3.     
  Take a big kettle and start boiling some water. When the water just starts to boil place a few tomatoes in the water.

4.   

  When the skins start to crack and peel they are ready to be placed in a bowl of ice water. This way you can handle the tomatoes and peel the easier.


em

5.       Peel away the skins.

6.   
  Cut your tomatoes into small chunks or just quarter them
.
7.    

   In another kettle place your chunked or quartered tomato, using a potato masher smash your tomatoes.

8.       Take your smashed tomatoes and place in a clean canning jar to about ¼ of an inch from the top. If you do not have enough to fill a jar just add some tomato juice to fill your jars. Add your canning salt according to directions and lemon juice.

9.     

  In a small kettle boil your lids. Tighten your covers onto your lids. I run a knife around the top of my lids to help it seal tighter.

10.  
Tomatoes need to be water bathed, so fill your water bath so it covers your jars by at least ½ inch.

11.  
Check your canning book for the time you will need for canning.

12.   When done take out and let cool. When your jars pop you know they are sealed. I let my jars cool overnight before I move them.

Now I will have plenty of tomato juice, chunks, and smashed tomatoes to last me through till next season. Canning has been in my family for generations and I love having homegrown produce year round. This saves on the grocery bill so much. Yes, it takes time to can but look at all the rewards you get for all your labor, and my family loves it.

My smallest canner and my water bath canner came from my grandmother, who gave it to my mother who then gave it to me. These canners have stood up to the test of times. I hope someday to pass it onto my children and beyond.


I hope you try this smashed canned tomato recipe for your house soon from Suzie Homemaker.

Tuesday, September 20, 2016

How To Make Homemade Tomato Soup

                It’s canning season again and my tomatoes are doing very well.
There are so many things you can do with tomatoes. You can make tomato juice, paste, spaghetti sauce or just eat them straight from your garden. I decided to use my Grandmothers recipe and try to make homemade tomato soup. My Grandmother gave my mother a lot of homemade recipes and now they have been passed down to me, so I can pass them onto my readers. This recipe is very simple to make and most people have all the ingredients right at home. I made a very big batch of this and I canned the soup for the winter, but you can also just make the basic small recipe and eat the soup right away.

Tomato Soup Recipe

                4 cups tomatoes (juiced)                                         1 small onion (chopped)
4 garlic cloves (minced)                                           2 cups chicken broth (option, take 2 bouillon cubes and dissolve them in 2 cups of hot water)
                2 Tablespoons butter                                               2 Tablespoons flour
                1 teaspoon salt                                                         2 teaspoons sugar

1.       Pick your tomatoes from your garden and wash them up, or buy some fresh tomatoes from a store. I like my own tomatoes since I grew them and they were free.

2.       Cut your tomatoes into chunks and put into a large kettle.


3.       Boil and smash your tomatoes as they cook until they are soft.


4.       Pour your tomatoes into your food processor or food mill like I am going to use. Since my Grandmother gave me the recipe I can at least use her food mill for pressing the juice through. I like doing it the old fashion way, this reminds me of my Grandmother.


5.       Take a little dish with a tight cover and pour about 2 cups of your tomato juice in with the 2 Tablespoons of flour, shake well. This will help thicken your soup.

6.       In a separate pan fry up your chopped onions and garlic in your 2 Tablespoons of butter. If you do not want to buy whole garlic, try minced garlic in a jar from a store. 1 Tablespoon of minced garlic is about 1 whole garlic clove. Fry your garlic and onions slowly until soft ( do not burn or brown them).


7.       When your onions and garlic are done add them to your tomato juice. Add remaining ingredients and simmer for 30 minutes. Enjoy your soup.

If you want to make a big batch of tomato soup like I do, here’s how to can the soup.


1.       After your soup has simmered, pour into your canning jars (either pint or quart jars). I made one batch with pint jars and today I am doing quart jars.

2.       Boil your lids and screw on the covers very tightly.

3.       Place in your pressure canner at 10# of pressure for 55 minutes for pints and 1 hour and 30 minutes for quarts. Again be sure to check your canners directions to make sure this is correct for your canner.

4.       After they are cooled for 1-day remove covers and label and date your jars. Enjoy your soup all year round.

This soup is great on a cold winter day just by itself or with a nice grilled cheese sandwich. Enjoy this soup right away or later when you are ready to pop open a can to eat. This recipe is very simple to make. My Grandmother would be proud to know I am sharing her recipes with other. Enjoy a great bowl of soup from Suzie Homemaker.


Saturday, October 3, 2015

Water Bath Canners and canning Tomatoes

This time, I would like to show you how to use a Water Bath Canner for canning tomatoes. I have two different types of Water Bath Canners I would like to show you. The blue Water Bath Canner has a round tray in the bottom and holds up to 4-quart jars. My big silver Water bath Canner has a rack inside that holds up to 7-quart jars. Either Water Bath Canner will do depending on how many jars you have to can at the time. Today I will be using the blue Water Bath Canner because I have only 4 quarts of tomatoes to can. Before you begin always wash your canning jars with hot soapy water. Next rub your finger around the tops of your jars to check for any cracks or chips. Never use jars that have chips or cracks because they will not seal correctly.


The first thing I will show you is how to juice tomatoes.

1.       Take your tomatoes and wash any dirt off them.
2.       Core the tomatoes and cut up into four to six pieces and place into a large kettle.
3.       Boil the tomatoes until they are soft.
4.       Pour into a food processor or food mill and squeeze out the juice leaving the seeds and skins behind.
5.       Pour juice into quart or pint jars leaving ½ inch of space from the top of the jars.
6.       For quart jars add 1 teaspoon of lemon juice and ½ to 1 teaspoon of canning salt to each jar. For pint jars add ½ teaspoon of lemon juice and ¼ to ½ teaspoon of canning salt to each jar.
7.       Boil your lids and screw on covers very tight.
8.       Place jars in Water Bath Canner and make sure the water is covering your jars at least ½ inch.
9.       Boil your quart jars for 15 minutes and pint jars for 10 minutes.
10.   Lift jars out with can lifter and let stand for 24 hours before removing covers.  Listen for the popping sound, this will tell you that your jars are sealing. Before storing away, press down on lids to make sure they have sealed correctly. If they pop they have not sealed correctly, put in refrigerator and use or try to use a new lid and can the juice over again.
11.   Label and date your jars with a permanent marker.

Next I will show you how to can tomato pieces or chunks.

1.       Take your tomatoes and wash any dirt off them.
2.       Take a big kettle and bring your water to almost a boil. Place your whole tomatoes in the water.
3.       Watch your tomatoes until the skins start to crack or peel away. Place the tomatoes in a bowl of ice water to cool down.
4.       When the tomatoes are cool enough to handle just peel away the skin. Cut out the core and cut into chunks or pieces and place directly into your clean jars.

5.       Fill your jars with only tomato pieces or chunks and fill to ½ inch from top of jars. Do not need to add any juice or water.  Just add 1 teaspoon of lemon juice and ½ to 1 teaspoon of canning salt to each quart jar. For pint jars add ½ teaspoon of lemon juice and ¼ to ½ teaspoons of canning salt to each jar
6.       Boil your lids and screw on cover very tightly.
7.       Place your jars in your Water Bath Canner and make sure the water covers the jars by at least ½ inch.
8.       Boil your quarts jars for 15 minutes and pint jars for 10 minutes.
9.       Lift your jars out with a can lifter and let stand for 24 hours. Listen for popping sound, this will tell you your jars are sealing. After 24-hours check to make sure your jars have sealed correctly. Press down of the lid, if it pops it did not seal correctly. Place in refrigerator and use or try a new lid and re-can the tomatoes ever again.
10.   Label and date your tomatoes with a permanent marker.

Water Bath Canning is easy and a nice way to preserve your fruits and tomatoes. Having fresh canned food all winter long is another way I save on my food bill. My whole family loves the fresh fruits and vegetables that I can every year. Yes, canning takes a little time but the benefits are well worth it. Knowing what is in my food and that I grew it myself makes me feel like I’m doing something good for my family. Using a Water Bath Canner or a Pressure Canner is a great way to have fresh fruits and vegetables year round. Have fun canning from Suzie Homemaker.